

©Photo by natalyelise
DIY:
Kandi Bracelets
Kandi bracelets - made to look like candy on your wrist - are the biggest must have fashion statement at music festivals today. DIY: Kandi Bracelets offers a step by step tutorial that will have you and your friends dancing to the latest trend.
Get ready to have fun and show off your craftsmanship by learning how to create your own kandi by following the basic steps below!
scroll
1
COLLECT SUPPLIES
Begin by collecting the following supplies:
-
Plastic Beads
-
Multi-colored pony beads
-
Letter beads
-
Unique shaped beads
-
-
Elastic String (plastic or thread)
-
Scissors
-
Scotch Tape (optional)
-
Super Glue (optional)
Learn more about each item and where to buy them online by clicking the link to the Supplies page below!

2
CHOOSE BEAD DESIGN
Look through your available beads and think about what patterns, colors, or words you may want to use.
Next, find a flat surface to layout your working design in a straight row that reads from left to right. Laying out the bead design before stringing allows you to see the design as a whole and make quick changes.
Typically there are about 26 to 28 beads per full bracelet - keep this number in mind to know when to add or subtract.
Whether you decide on a pattern or want a random selection of beads, it is good to make that decision before you start putting your kandi together. Have fun, the possibilities are endless!
Need inspiration? Explore the Kandi - Land Gallery in the link below!


3
MEASURE YOUR STRING
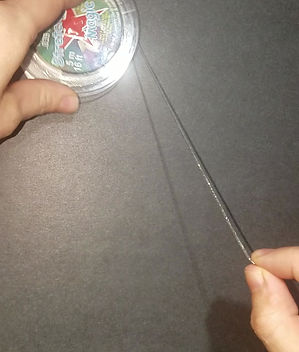
Unravel a length of string from the spindle, and start by wrapping it loosely around your wrist until the string end crosses the attached side to make a complete circle. Make sure the string end overlaps about an inch to leave room for tying the string at a later step.
Remove string from your wrist and use a finger to mark the intersection of the string. The intersection is where you will use your scissors to cut the string from the spindle.
Typically the string is around 9 to 11 inches long before cutting for reference.
Tip: Having extra string is better than too little because you can always cut the extra length off when finished.


4
STRING YOUR BEADS
First, prepare your string for beading by taping down the left end near the flat surface containing your design from step two.
String the beads onto the open right end starting with the left most bead of your design. Move onto the next step once all beads are strung and you are happy with your design.
Optional: Risk - takers may choose to forgo tape and string the beads by folding the string in half and placing both ends in one hand. Be careful not to let one end slip, otherwise you will have to start over!


5
FINISH YOUR BRACELET
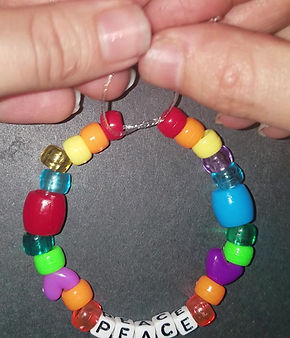
After stringing your bead design, securely hold onto the right end and carefully remove the tape from the left side to retrieve the left end of the string. While holding both ends keep the bracelet laying flat on your surface because it will keep the beads from falling very far if one end slips.
Next, position all beads in center of string with loose ends of about an inch on each side. Then, tie both loose ends together so there is a very small gap between beads. Then tie an additional knot on top to make a secure square knot. Ensure the knot is secure and stays in place, and the bracelet is finished! Excess string can be cut once you have tied the knot.
Tip: Don't tie the bracelet too tight, while it does stretch, if it is too tight the pressure from the beads might cause the bracelet to break when stretched to wear.
Optional: Add a drop of super glue directly to the knot once completed. This offers the knot extra protection from unraveling all of your hard work.


6
GO SHOW OFF YOUR NEW KANDI!
Spread the love and show off your craftsmanship at your next music concert or festival.
Thank you for following the tutorial. Additional questions may be asked via the Contact page!
Want your finished kandi bracelet to be featured on the Kandi - Land Gallery page?
Click the link below and send in those photos!!!


